Wednesday

face kande | the 10 minute makeup routine

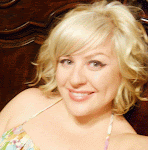
Whether you are in a hurry or prefer a no-fuss makeup routine here is a how-to on creating an everyday look in 10 minutes flat with my sister, Stacia modeling. Just spend 1 minute on each step.

“For there is no friend like a sister, in calm or stormy weather, to cheer one on the tedious way, to fetch one if one goes astray, to lift one if one totters down, to strengthen whilst one stands.” -Christina G. Rossetti
Our before look. eek!


Step 1:
Prime: A primer is a must – it helps smooth out a complexion, conceal large pores, control oily skin and sets your makeup.
:: product: choose the best primer for your skin – I recommend checking out Sephora for several options.

Base: Especially for summer the best choice is a mineral powder. Apply in circles with a large brush or with a foundation brush for more coverage.

Conceal: Whether you have blemishes or dark circles a little concealing will go a long way to waking up your face and giving a more even complexion. Here we used a treated concealing pen and dabbed some white on the inside of Stacia’s eyes and some light concealer underneath.
:: product: Proactiv’s tinted concealer for blemishes and Pixie Beauty highlighting kit for eye concealer


Step 2:
Contour: Contour with a few strokes – start my making a fish face and contour right underneath the apples of your cheeks. Then with the excess apply to your temples, your jaw line and the sides of your nose.

Highlight: Highlight your cheekbone and your eyelid with a highlighting powder.
:: product: Pictured here on Stacia is Mac’s shimmer powder (one of me and my sister’s fav products)


Step 3:
Eyeliner: All you need for a quick makeup look is eyeliner – eye shadow isn’t necessary. Apply the liner carefully to make sure the line is smooth and perfectly applied. Here we’ve done a slight wing on the outside of the eye. We also added liner underneath for definition to show off her big, green eyes.

Eyebrows: Fill in your eyebrows with a pencil and shape with a brush
:: product: I love Mac Cosmetics blonde eyeliner called Lingering – it worked great on my sister’s brunette brows too


Step 4:
Curl lashes: Don’t skip this step – it will go a long way to waking up your eyes. When curling make sure to get the lashes from corner to corner and hold for 5 seconds.
:: tip: For a more dramatic curl warm the curler under the blow dryer or car heater for a few seconds.

Mascara: Layer a couple of coats of mascara on your top lashes –here we’ve applied to the bottom lashes as well.
:: product: Here we used Stacia’s fav – Cover Girl's Lash Blast.


Step 5:
Lip color: To finish apply a tinted lip gloss.
:: product: I used a coral Beauty Rush lipgloss by Victoria’s Secret


...10 minutes later

Tuesday

mane kande | embrace the pony


The hair is the richest ornament of women. - Martin Luther

The pony or ponytail is a hair-do staple. It can turn a bad hair do into a good one and there are lots of ways it can be done - messy casual, low and sexy or built high with lots of drama.

Here are some simple steps to a casual pony (with a lot of ump!) that is appropriate for work and the weekend.

Step 1: Tease or backcomb the top middle strip of your hair


Step 2: Tease or backcomb the middle sections of your hair


Your hair migh look something like this. Eek! Hang in there...


Step 3: Gently smooth the top layer of your hair down


Step 4: put in a low ponytail, use a mirror to smooth all sides and spray for hold
  

Step 5: For extra ump you don't have to use an entire bottle of hairspray - instead take the hair in your ponytail and squeeze towards your head. This will lift the pony and your bump and give you a little different look.


Caution: you will have people stop and ask you for Bumpits 1-800 number! xoxo -kande

Thursday

eye kande | the benefit of pretty packages

I adore benefit cosmetics pretty, vintage packaging. Here are some of the favorites.

Gabbi Makeup Bag (get it here):


Natually Lush Lashes (get it here):


Touch me then try to leave me sexy body cream (get it here):


Take a picture, it lasts longer - a glimmering  body lotion (get it here):


Confessions of a Concealoholic (get it here):
  

Dandelion face powder (get it here): 


Dr. Feel Good velvety skin balm (get it here):


One hot minute sexy shimmer powder (get it here): 


Even their website has a some great design elements: Like page headers:


And beauty lessons of all kind (go there):

Saturday

eye kande | Hollywood gingers (red heads)

Natural redheads make up only about 2% of the population. Natural or not - here are some of my favorite,
famous gingers:

"Once in his life, every man is entitled to fall madly in love with a gorgeous redhead." - Lucille Ball


Clara Bow kickstarted a fashion for redheads in the 20s and actresses Ginger Rogers, Lucille Ball and Rita Hayworth made careers after changing their hair color to red.


Laura Linney: Love Actually is perhaps my favorite movie of all time - actually, I am watching/listening to it now. Laura often plays a wholesome beauty with complex character and most often sticks to her red roots.


Christina Hendricks: Christina nails the roll of Joan Holloway on Mad Med and is a classic, redheaded beauty. I love the fiery red of her hair and her bangs allow us to see even more of the color - gorgeous.

Amy Adams: Amy was discovered at a dinner theatre performance in Minnesota; her energy and of course, her red hair sparked the interest of a film producer. She is adorable.

Debra Messing: AKA Grace Adler. Debra's been named one of the Most Beautiful People in world by People Magazine and her smarts (she has a Fine Arts' Masters) make her even more attractive. Tidbit: You can follow Will & Grace quotes at @wagquotes and Debra at @Debra_Messing


Kirsten Dunst: Kirsten is of German (father's side) and Swedish (mother's side) descent - which evidently makes a pretty good combination. Although Kirsten's been blonde and brunette I think the red suits her best.


Lindsay Lohan: All things aside Lindsay is simply gorgeous and even though she has experimented with different shades of red she is a natural.

Who's your favorite redhead? Comment or send me a tweet at @eyekandeblog.

Monday

eye kande | how to get a smoky eye

The how-to for creating a smoky eye for day or night using Victoria’s Secret makeup. Let’s. get. sexy.

SUPPLIES (as pictured here)
Eye Shadow Quad in Sultry – Victoria’s Secret, $15
Dark Chocolate Brown Eyeliner – Victoria’s Secret, $8
Beauty Rush - Limited Edition Denimania Wet/Dry Shadow - Victoria's Secret, 2 for $12, 5 for $20
Pro Voluptuous FX Mascara – Victoria’s Secret, $12

SMOKY EYE for DAY
Step 1: prime your eyelid with a primer or foundation to help set the shadow and prevent creasing. Then add a subtle highlighting shadow all over with emphasis right under the arch in your brow.

Step 2:  Next add a white highlighter on the inside corners of your lids to open them up and concealer under your eye (dab with your index finger). Finally, fill-in your brow (if you are going to do a smoky eye you need a balanced eyebrow to anchor the look).


Step 3: Gently pull the corner of your lid taut. Apply the eye shadow from the base of your lid to right above your crease. Start with a small amount just as a base coat and make a rainbow shape ensuring a gradual decrease of shadow from base to crease. Think of it as applying nail polish – the first coat doesn’t have to be cover perfectly and it won’t be the final color – it’s just the base.

:: Tip: Place a Kleenex under your eye as you are applying so the shadow doesn’t fall on your face.


Step 4: Now, take a darker shadow and apply over the top to fill in the base coat you applied. Again, being careful to create a perfect rainbow arch and gradient – if it’s blotchy or uneven it can ruin the look.

:: Tip: It is important to check and recheck how it looks during application. Take care not to touch the eye shadow to your brow and to avoid creating an 80s cat-eye swoop.

Step 5: Add a black liquid liner on the base of your lids with a slight upward wing on the corner of your eye.


A profile of the subtle day-time look, appropriate for the office or a casual day of shopping.


SMOKY EYE for EVENING
Steps 1-5 plus

Step 6: Take a cream-based pencil and gently dot a line across the base of your lower lashes making sure to stay very close to the natural lash line. Then take a q-tip and in short strokes move side-to-side to remove the liner – the goal here is to leave a subtle shadow rather than a hard line.


Step 7: This step makes a big, visual difference and if you are going to be taking photos – it’s a must. Gently pull down your lower lid to expose the ridge on the inside of the lower eye lid. Dab with the outside of your finger to remove moisture and apply the liner from corner to corner.


Step 8: Curl your lashes. Apply mascara.


Step 9: Final touches. Use a cotton ball to clean-up any loose or excess shadow by lightly sweeping over the area. Make sure you have even coating and gradient from eye-to-eye. And ensure you have a nude or lightly glossed lip.

:: Tip: As a blonde I like to use a dark brown on bottom just to make sure I don’t appear to have raccoon eyes.


Trouble? In a smoky eye melt-down? Send me a tweet now at @eyekandeblog!

Wednesday

face kande | for the love of olive virgin oil

I adore the DHC Skincare line. If you haven’t tried their products read on to find a new reason to love olive virgin oil.

DHC is Japan’s No. 1 direct mail skin care company and their specialty is virgin olive oil-based products that are completely natural and great for your skin. Here are a few of my favorite products: Deep Cleansing Oil, Olive Virgin Oil and Velvet Skin Coat.


Deep Cleansing Olive Oil: I adore the deep cleansing olive oil. You apply to a dry face and it smoothes on rich and makes your skin feel really pampered and supple while it completely dissolves makeup and other impurities. Then you simply wipe the oil off with a wet washcloth and you’ll be amazed how clean your face feels. This is especially a great way to clean your face if you have sensitive skin, a spray tan or sunburn as it’s very gentle.

Price:: $25 for the 6.7 oz or try the 2.3  oz for $12.50.
The Olive Essentials Set that I just bought has the Cleansing Oil, Cucumber Toner, Olive Virgin Oil and Olive Oil and Honey Soap for $79 - which saves you $25 if you were to purchase separately.


Olive Virgin Oil: I know it doesn’t seem quite sane to add oil to your skin (especially if you are as oily-skinned as me) but it is an absolute luxury that is wonderful for your skin and won’t clog your pores. This is also a great product for sunburned skin or as an intense moisturizer at night. Just warm a few drops in your palms, rub them together to warm the oil and apply. Ahh.

Price:: $39 for 1 oz. (2-3 drops is enough for each applications so the bottle has longevity)

 
Velvet Skin Coat: This is a great skin powder-gel primer that glides over skin to give a smooth foundation with or without makeup. It is also a great filler for enlarged pores and helps control shine.

Price:: $21 (this tube lasts a while) 


Doubletake: If you order the $2 catalog on their site you get one with samples – definetely do this. Also, with any order you get your choice of 4 samples.


One of my little dreams? To be featured in the DHC customer spotlight.
xoxo - kande

Sunday

lip kande | the red lip

The red lip is in and you can pull it off. Check out the easy, 4-step process on applying red lipstick and the guide on colors for your skin type plus lots of useful tips throughout.

"Even when I am home alone I wear lipstick. I feel naked without it." -Bette Davis

Step 1: prep & prime


Add a little moisturizer (any chapstick will do the trick) and let soak in for a couple of minutes, then blot. Next, prime to erase the natural lip color and to prevent feathering - benefit's lip plump does both plus the packaging is so fun I can hardly stand it.

:: Tip: I like to highlight the flume or philtrum dimple (that groove above your lip). My favorite eye brightening kit from Pixi (now sold at Target) has a great all-purpose cream-based highlighter that is perfect or a little highlighting shadow will do.

Step 2: lining the lips


Fill in the lip with a red lip liner (nude will work too) by starting in the center and make sure your strokes become shorter and more precise the closer you get to the outer lip line. Make sure that your liner matches your lipstick.

:: Pictured: MAC's lip liner in Brick

Step 3: lip color, powder & set


After you have completely lined and filled-in your lips with liner, apply your red lipstick and powder your lips to set provide a good base for long-lasting color. Hand-me-down tip courtesy of Hollywood's, Bette Davis.

:: Pictured: Any powder will do but I am using a Clinique face powder here - actually, the best powder ever but that is for another post.

Step 4: lipstick & gloss


Reapply your red lipstick, dab on a little gloss in the middle of your bottom lip for extra appeal and you have, my dear, the much sought-after red lip.

:: Tip: to make sure you don't get lipstick on your teeth close your mouth around your pointy finger and remove slowly.


Simple guide: choosing a red lipstick

Fair skin tones
Clinique Angel Red: a blue-toned red worn by Kidman in Moulin Rouge
MAC Russian Red: Gwen Stefani's red
MAC Scarlett Empress: best for pale skin


Medium skin tones
MAC Viva Glam: the perfect red - known to be a fav of Kate Winslet's
MAC Ruby Woo: a matte, blueish-red
YSL Rouge Pure No. 131 Opium Red
MAC Red Lizard


Olive & dark skin tones
Nars Jungle Red: Gisele Bundchen is often pictured in this lipstick
Chanel Rouge Hydrabase Creme Red
Nars Fire Down Below


Red lip color for the faint of heart
Laura Mercier Truly Red: lightweight red that you can apply in layers until it suits you
Clinique Black Honey: (their #1 seller) universally flattering; looks different on everyone